Ultimate Guide to Gun Cleaning
In our 'Ultimate Guide to Gun Cleaning' you'll find everything you ever needed to know about maintaining and cleaning your rifle or shotgun. We cover everything from choosing the right gun cleaning kit to how to clean a rifle barrel and what rifle scope cleaning kit to look for. Find out what you need in your rifle cleaning station and how often you should be cleaning your shotgun.
Just fill in your details below to get your free guide.
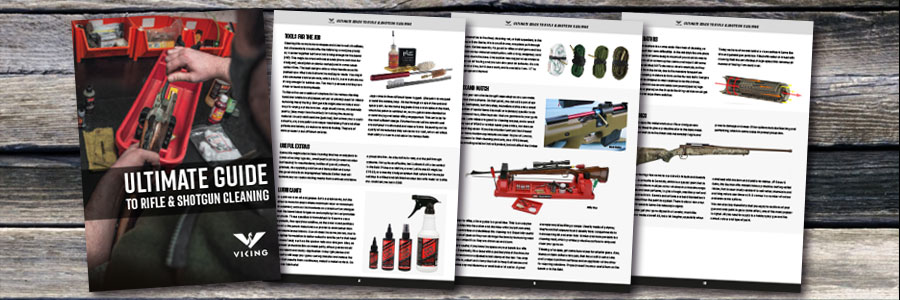
DOWNLOAD OUR
Ultimate Guide to Gun Cleaning
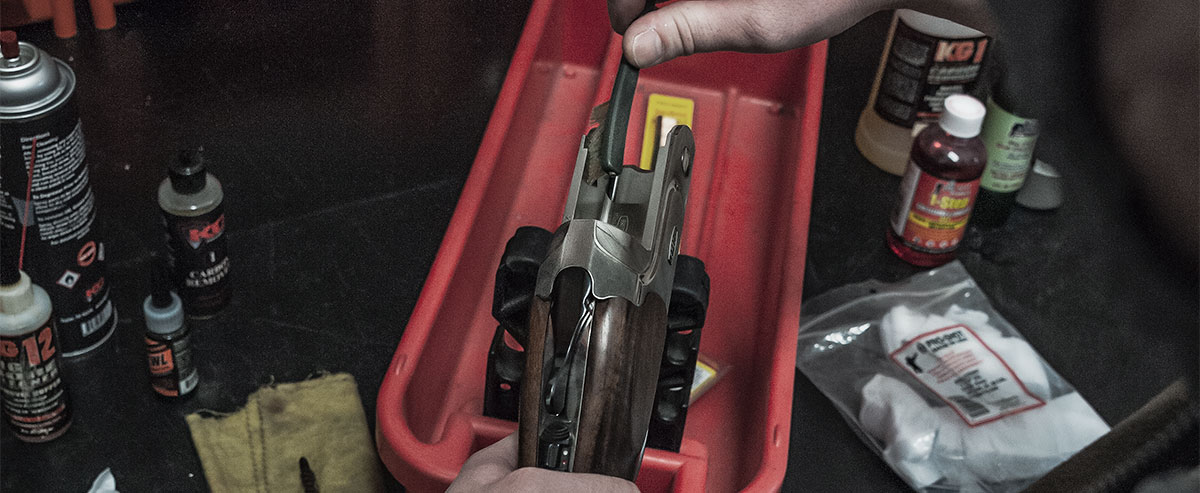
In the Army keeping your small arms and heavy weapons clean and functional is a very serious business, carrying punishment if you don’t get it done. Put it this way; if it doesn’t work properly, or can’t work at all, then it’s no good to man or beast! However, in sports shooting the view to this essential task is not always treated with the same degree of attention it deserves.
Some people almost proudly boast that they’ve never cleaned their guns, nor will they, others are perhaps too anal and lavish a bit too much attention on the subject. In this feature we seek to find a sensible middle ground for maximum efficiency and also go a bit further in terms of peripheral areas, where sensible measures can be taken to ensure protection and longevity of your precious equipment. After all it was your hard earned cash that bought it.
Why Clean
Maximum functionality is the goal, with a clean and properly run in bore the gun will shoot better, which can be further supported by a correctly functioning mechanism and feed system. Stocks too need some TLC, certainly those made of wood and it’s not just about keeping an expensive piece of timber looking good. As if they dry out through lack of attention, they can split and even suffer damage from recoil Likewise, exterior metal surfaces can be blued, blacked or coated in some way and if they lose that protection rust and its best friend; corrosion will set in.
Differences

Shotguns and rifles differ a little due in the main to the nature of the bore. The former are smooth and fire a charge of shot, be it lead or the modern alternatives. But you will still get shot and fouling deposits that need to be removed for best performance, so cleaning is still essential. Plus, as most guns use removable chokes these days, thought has to be given to the threads and the ability to swap them over easily, as a lack of cleaning, or worst corrosion, can lock them in solid. Pumps and semi-auto guns by their nature allow a lot of fouling and unburned powder back into the action and trigger mech and in some cases operating systems (semi-autos), which if left will cause problems.
Rifles are a lot fussier, the spiral rifling in the bore, by its nature will retain a lot more powder fouling, and copper residue from the bullet. These can and do have a massive effect on accuracy. Equally, small pieces of brass from the cartridge case will get deposited into the locking lugs and bolt head too. The final part of the barrel (the crown), where the bullet makes its transition into open air is also highly critical as it’s a good place for corrosion to build up and if it gets damaged or worn, accuracy will deteriorate, to the point where the rifle is ruined. Equally so at the end of the chamber where the rifling starts (the throat).
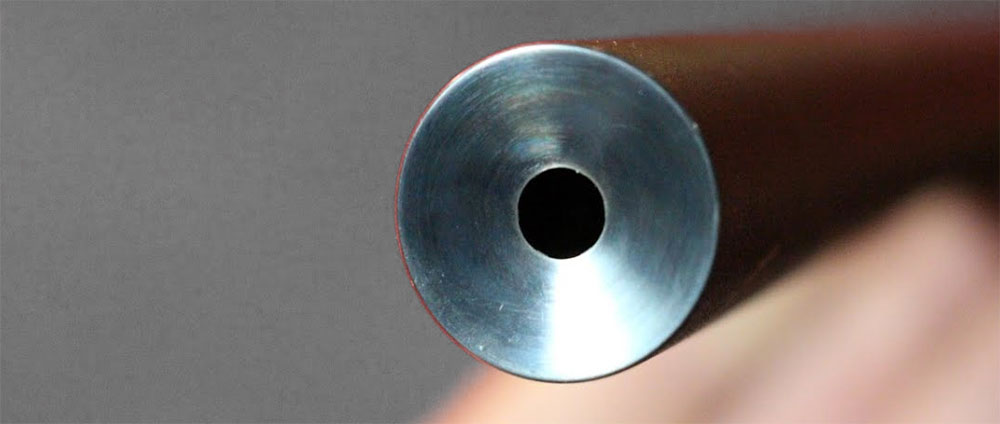
Semi-auto rimfire rifles also suffer from unburned powder and fouling blown back into the action, along with tiny pieces of lead shaved off the bullet as it chambers, all will cause reliability issues. One difference in all rimfire types is that barrels and bores seem almost indestructible, probably down to the low power of the ammunition and the use in the main of lubricated bullets.
Tools For the Job
Cleaning kits come in many shapes and sizes to suit all calibres, but all essentially should offer the following: a rod (one-piece) or, in screw-together sections that is long enough for the barrel (VIP). This might be wood with brass ends (more common for shotguns), steel (plain or plastic-coated) and in some cases carbon fibre. The best designs offer a rotary handle so as it’s pushed up a rifled bore it allows the rod/jag to rotate. You might also encounter aluminium rods, which are OK, but in truth are not strong enough for serious use. Too much pressure and they can shear or bend catastrophically.
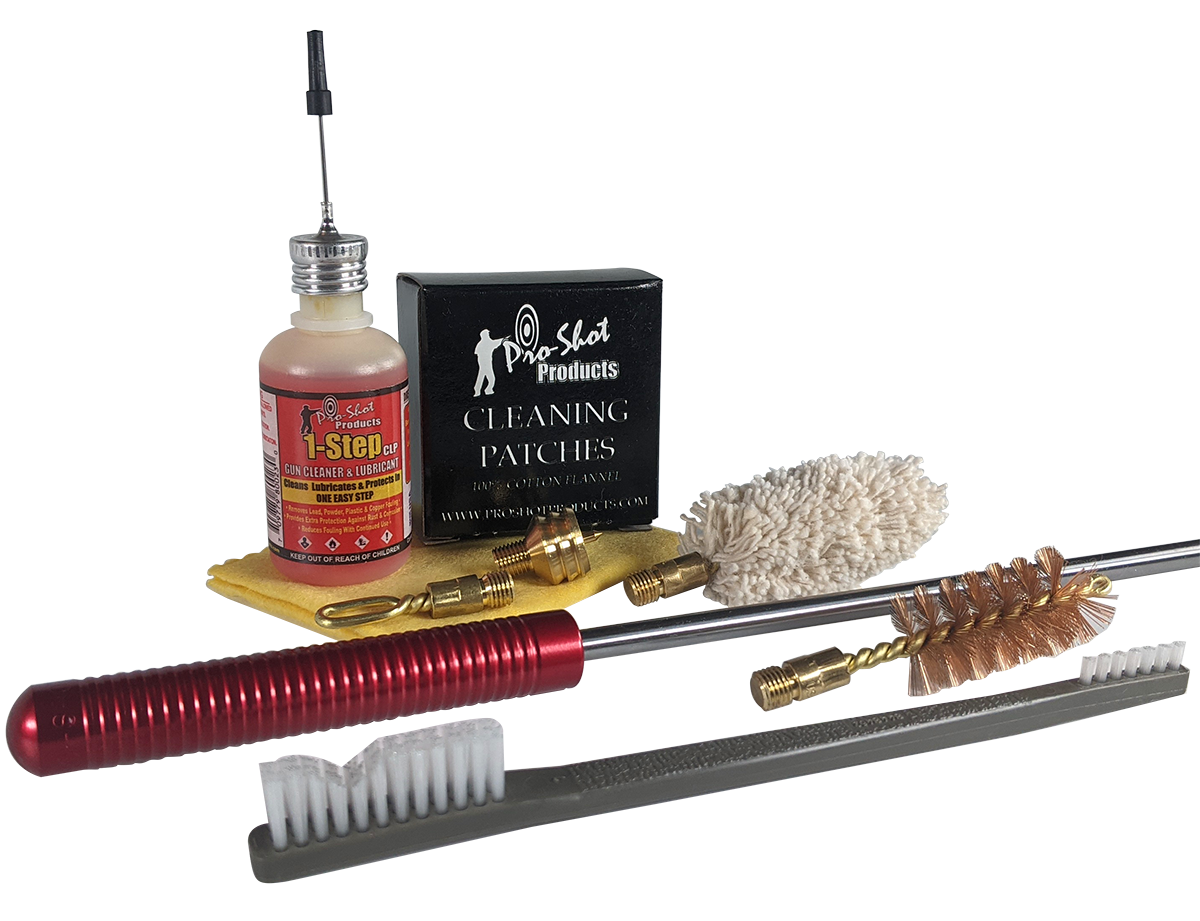
To this will screw a series of adaptors for the various cleaning functions: bristle brush (copper, natural or plastic) used for initially removing heavy fouling. Shotgun kits might also include a wool mop for drying out the bore too. Jags usually brass, occasionally plastic, (stay away from the latter) for holding the cleaning material. Usually cloth sections (patches), that allows you to apply solvents, oils, bore polish and copper neutralising fluid and other potions and lotions, as well as to remove fouling. They are of various sizes to suit different calibres.
Jags come in three different types: lugged - (the patch is wrapped around the outside, loop - it’s fed through an eye at the end and spear point. As the name suggests it has a slim spike at the front, which the patch is centered on, so you get an even distribution around the jag and better rifling engagement. This last is by far the most efficient design. Patches too are calibre-specific and encountered in both round and square forms. Depending on the quality of manufacture they can be hard or soft, which will affect their ability to draw in and retain the various fluids.
Useful Extras
Some kits might also include cleaning brushes or adaptors to scrub at locking lugs etc., small plastic picks (or even wooden toothpicks) for mechanisms, bottles of gun oil, solvents, greases, de-coppering solution and bore polish and even the good old silicon-impregnated ‘Miracle Cloths’ that will remove any corrosion making marks from surfaces and leave a protective film. An alternative to rods, are the pull-through systems. Not quite as effective, but it allows it all to be carried in the field. Prices are relative, a small, all-in-one kit might be £15-20, or a swanky shotgun system that caters for the major calibres in a fitted and felt-lined wooden box with metal oil bottle etc. could set you back £200.
Lubricants
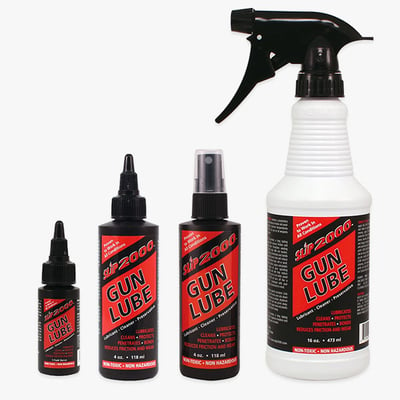
A quick word on oil and grease. Both are lubricants, but the latter is more for areas where maximum wear or movement is expected, such as the trunnions on a break-action shotgun that the barrel block hinges on and anything that reciprocates or pivots. Those specifically formulated for firearms use a synthetic, fluoropolymer additive, as the small sized particles bond to the parent metal and are proven to work better than petroleum-based blends. Gun oil does the same job but, due to its lighter formulation is better suited to smaller parts that need to move freely, such as the ejector rods on a shotgun. Also, as a general protective film on metal parts, where grease would be too heavy and sticky. Application in the right places and amounts will keep your guns running sweeter and reduce the wear that results from continuous, metal-to-metal contact. Do not, over-lubricate!
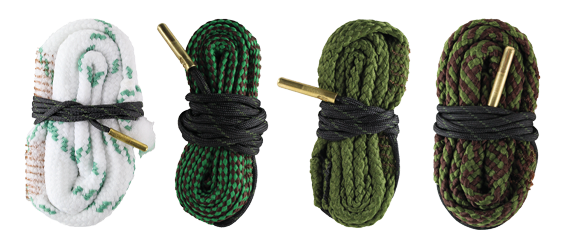
An alternative to the fixed, cleaning rod, or field expedient, is the generic Bore Snake, this is an all-in-one, one-piece pull-through system. Calibre-specific, it’s good for rifles or shotguns and has a thick woven material construction, with a long, weighted, cord to drop down the bore. One section has copper wires woven in to scrub off fouling and you can also pour on solvents. It’s one pass at a time, but it does work, and is available from .17” to 12-gauge and beyond.
Mix and Match
All this gear can also be bought separately so you can make up your own systems. On that point, you can add a pot of ear buds, toothpicks, toothbrushes, microfibre cloths and a small selection of useful items like multi or individual, specific tools like screwdrivers, Allen keys etc. that are germane to your gun’s needs. Lens wipes are good for cleaning scopes, and a small spray can of WD40 or similar never goes amiss, nor does an aerosol degreaser. If you like wooden furniture then linseed oil, or more modern equivalents are ideal. Napier of London, well known for their cleaning products, do a VP90-based, waterproofing solution that will protect, but not affect the timber.
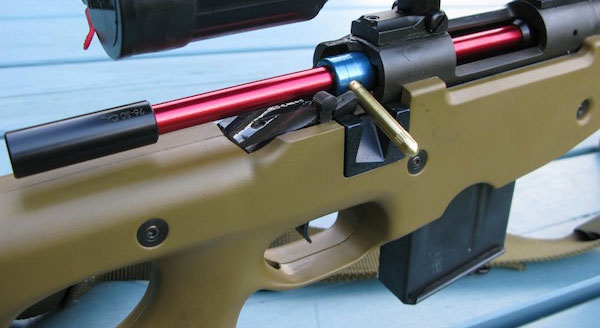
Mainly for rifles, a bore guide is a good idea. This is an adaptor that slides into the action and chamber with the bolt removed, that centralises and stabilises the cleaning rod. Especially useful with steel types as they can damage the bore by increasing wear if they contact it as they are drawn up and down.
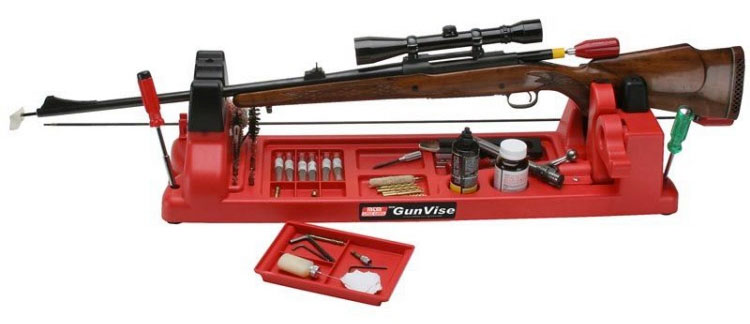
Equally useful, if you have the space on your bench is a rifle vice. Essentially, it’s a base with a padded yoke at the front for the forend and an adjustable butt clamp at the rear. You drop the rifle in, adjust and clamp the butt to keep it all secure and it makes any maintenance or work task a lot easier. A good example would be fitting a scope. Usually made of polymer, they’re not that expensive and usually have compartments to hold cleaning kit and even rods. Similar and more portable is a cleaning matt, which provides protective surface to strip and clean your guns on.
Thinking of scopes, get some lens wipes for exterior glass. Also, there’s an item called a lens pen, that has a soft brush at one end to wipe dust from surfaces and an applicator at the other for cleaning solutions. Properly used the are a useful item on the bench or in the field.
What do I need?
When it comes to what you need and how much, there’s a slight divide between shotguns and rifles. Generally speaking, a rod big enough for a 12-gauge will also be able to go up or down calibres, it will just be the brushes and jags that will differ, saying that a common loop should handle all size patches. However, firearms are more demanding and require more calibre-specific solutions.
The chances are you’ll have more than one rifle, say a 22 rimfire and 223 Remington and 308 centrefires for example, so you will need two rods. A .22” diameter one will do the rimfire and centrefires up to 243 and even the 308 Win. However, a larger .30” cal and above model will not fit the rimfire and in truth is better for the larger calibres like 6.5MM and above. Equally, if you have a 17 calibre, then you’ll need a dedicated rod as the .22” will be too big.
Matching the patch size to jag and calibre is equally critical, as you can get into some serious trouble if you get it wrong. The jag (+ patch) should be a firm, but sliding fit in the bore, when you push, if there’s no movement then stop and pull the rod out. If you force it, you might bulge the barrel, or just get it jammed and you’ll have to go in from the muzzle to knock it out. With the 17 calibres, it’s important to use the correct patch size, as .22 is too big and will jam. In certain cases, the slim .17” jag can be pushed through the patch when it’s in the bore, due to its small diameter.
Shotguns
So, let’s start with smoothbores, here’s what you will need: suitable rod, jag/loop, brush, mop, patches, solvents, grease and oil, cloth and maybe linseed oil or a similar wood treatment. Plus, items like small picks, cotton buds and tools as required. First of all, you should know how to strip your gun to its component parts for cleaning, be it break-barrel, pump-action or semi-auto. A word of warning here, do not attempt to strip down areas like trigger mechanisms etc. as unless you truly know what you are doing you will be in big trouble.
If you feel your trigger mech or other sub mechanisms need looking at, we say; take them to a competent gunsmith, as they will know what to do. Yes, there will be a cost, but better that, than you taking it apart and loosing bits or just making a hash of the job!
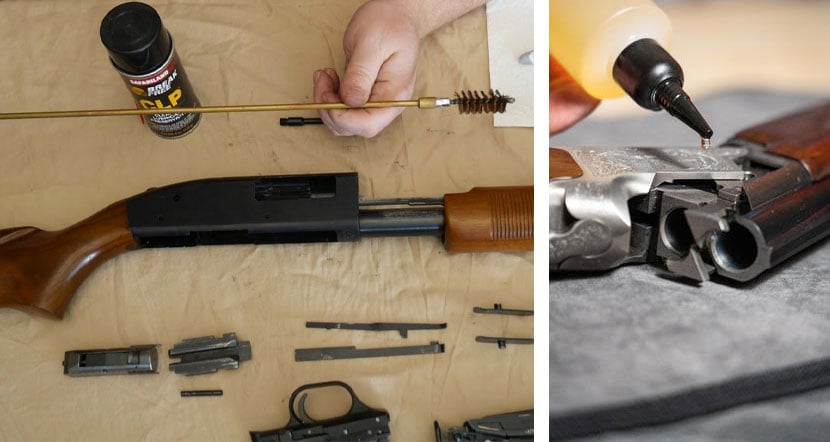
With a break-barrel, you just need to get it down to the barrels, forend and butt/action. For a deep clean, pumps and semis require a bit more, as you need to know how to take out the bolt, operating mechanism and trigger group en-bloc (do not strip this item), which is easy enough.
Barrel - fit the brush and scrub the bore to loosen up any fouling, optionally you could put some solvent on the to help. Next, run a solvent-soaked patch down and leave for 5 minutes, then patch out (one pass, one patch) until they come out clean (white), indicating the fouling has gone. You can mop out the bore to remove any residue, but more patches are better, as mops will hold fluids, so defeating the purpose.
Front & Back
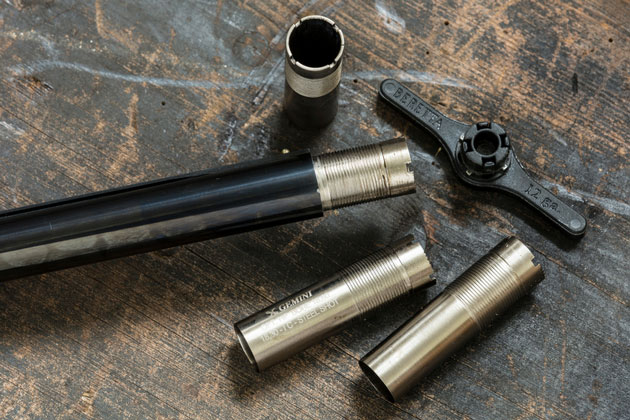
Now it’s time to clean the chokes and ejectors. Most modern shotguns have, replaceable, screw-in multi-chokes, designed to vary pattern size and account for different range requirements. They come with a fitting key, so unscrew them and clean the threads on the tube and barrel, then apply some gun grease and screw them back in. Grease is more tenacious than oil, so will resist heat better, please note you don’t need to wind them in hard, just nip them up.
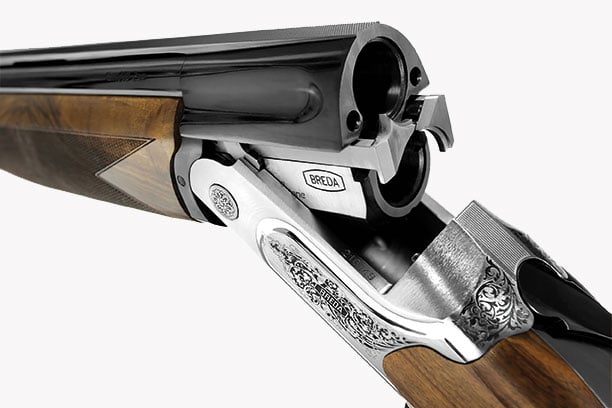
Turning to the breach end, you will see the ejectors on the sides of the chambers, which slide back and forwards as the action is opened and closed. Remove any obvious dirt with picks or cotton buds and also around the chamber mouth where the cartridge’s rim will sit. Then apply a drop of oil on the arms for smooth operation. In terms of sequence, it’s probably best to do the chokes and ejectors before the barrel, to avoid depositing fouling in the bore.
With the forend off, makes sure the locking mechanism works easily and clean as necessary and add a dab of oil on the catch and lug. It’s also a good idea to put some grease on the front face of the action and where the trunnions fit. As wear will take place every time the gun is opened and closed, and a dab of grease will reduce this problem and also make it smoother. Finally, wipe down the breech face and check the firing pin holes to make sure they are clear and fee of debris. A dab of oil under the safety catch/barrel selector is advised too.
If the gun is being stored, then oil the bore and wipe down the exterior with an oily cloth or similar. Remember, before shooting again, dry the bore as oil deposits can cause bulges if left when firing. If you have wooden furniture, then a little stock oil rubbed in will nourish and protect the timber, you don’t have to go overboard here, but regular application will keep the wood in top condition and help resist the weather.
Pumps and Autos
Cleaning a pump or semi is more involved and a mandatory task for reliable operation. Barrel cleaning remains the same, except that on gas/piston-operated guns (Remington 1100/11-87) there are usually twin transfer ports drilled into the barrel, which directs the gas onto a piston that connects to the bolt by metal straps (action rods). As can be imagined, gas residue will get back into the receiver and build up, along with unburned powder from the barrel. It literally gets everywhere and can cause lots of problems if not removed. Pumps are the same, but there’s no gas to worry about. Recoil-operated guns like the Benelli M2, do not use gas ports, but the energy of the cartridge to cycle the action, so are cleaner to a degree.
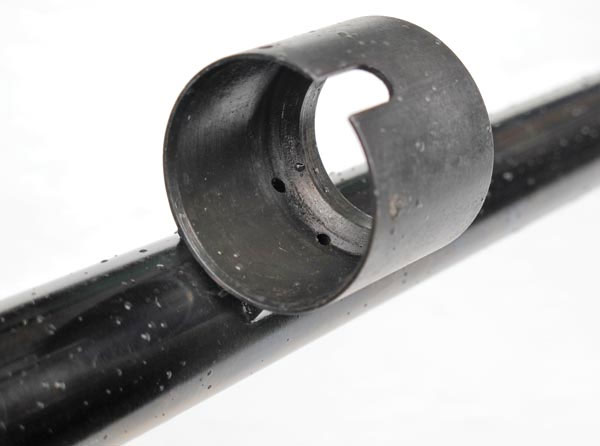
First of all, you will have to learn how to strip your gun: barrel off, bolt and operating mechanism out and also the trigger group. This component is retained by cross pins so can come out en-bloc, again, do not take them apart, but when removed there’s lots of access to clean them. A blast of de-greaser will do the trick and you can remove the rest with cotton buds, toothbrushes and picks. Equally so, the bolt and inside of the receiver. Do not over-lubricate the inside of the action or trigger mech, as too much will attract and hold debris and increase its build-up.
An extra area on repeaters to consider is the magazine tube, that sits under the barrel and provides a place for the piston to cycle. It’s not a bad idea to remove the spring and follower and clean them along with the inside of the tube. If you buy a gun from new, the instruction will show a step-by-step guide to stripping, if not then there’s tons of videos online.
Rifles
Now we get more technical with rifled firearms, and like shotguns there are a number of types to consider: bolt-action, lever-action, straight-pull and single/double guns, all only available in centrefire calibres. Semi-auto and pump actions can be added to this list but only in rimfire, due to UK gun law changes over the years. Equipment-wise, if you have a bolt-action then a bore guide, as already mentioned is a useful addition, as is a rifle vice.
Depending on action type, some guns in this class can only be cleaned from muzzle to breech, typically pump and lever-action and some straight-pulls and semi-autos. Barrel-wise, the job is the same: scrub out the bore, solvent patch through and leave for five minutes, then rod out with clean patches until they come out white. It is said that for every round you fire, you need ten passes with the brush, which could mean a lot of work. But that’s only the start of the process!
Spit and Polish
Rifling, by its nature traps dirt and fouling and if left in the bore can physically reduce the inside diameter, which can cause inaccuracy and even increased pressures. Equally, the copper on the bullet’s jacket, being soft will coat the bore with a slim film of material every time you fire and must be removed regularly for best performance.
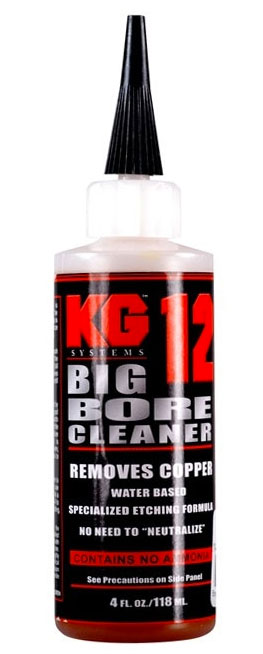
There are a number of copper removal compounds, the older types, which have been, or are now being phased out can be downright dangerous, as they use ammonia for the job. Warnings on bottle might include: ‘do not use in enclosed spaces, do not breath in fumes, wear gloves, eye protection and mask and worryingly; do not leave on for any more than five minutes in the bore.’ You get the idea? Modern potions are more benign and maybe a tad less effective, but better safe than sorry.
To see how much copper, you have in your barrel, clean it first then run up a clean patch and stop about 1/2” from the muzzle and shine a torch inside. The light will reflect off the patch and you will, physically see the copper on/in the lands and grooves. To be honest, it’s tenacious and a bugger to get out, especially if you’ve let it build up.
The process is to wet a patch with the copper solvent, run it up the bore and leave it for five minutes, then scrub it out. Problem 1 - don’t use a copper brush as that will give a false reading as the fluid will act on that too. Bristle or nylon is better. Quite often, one application is not enough, a better method is to pass the patch/solvent up and down the bore a good few times, which seems to work and repeat as required. It takes time and it’s better to keep on top of it from day one.
Copper fouling will show up green/blue or even yellow on the patch, depending on what brand you use. Once you are happy, thoroughly clean and dry the bore then oil it.
Running In
Generally speaking, a rifle barrel from new needs running in a bit, as it probably takes a good few rounds for it to normalise. Many shooters adopt a shoot and clean process, here you fire one shot then patch through with solvent (wet) then dry and repeat for 20-rounds, followed by 30-more at two and five round intervals. It’s not essential, just good practice, if you have the inclination, if you don’t, then no big deal, as the high quality of modern firearms tends to offer a good product, straight from the box.
Another aspect to consider is polishing the bore, as the smoother the surface is, the less interference to the bullet as it passes and the less places for debris to stick to. There are special pastes and fluids you can get, the oldest is probably Motty Paste or the Later JB Paste. Essentially, you coat a patch with the compound and run it up and down the bore 10-15 times, then clean it out. Although abrasive by nature it’s not aggressive in the same way running a sandpaper patch up the bore would be. But with all things of this nature, go cautiously, as with some systems you can literally destroy a chambers throat, by overuse.
Not that different, just a bit more
General rifle cleaning is the same as shotguns, as you get into the nooks and crannies that hold dirt and dig them out with toothbrushes, cotton buds and picks and lubricate as required. Areas to consider are the bolt and action locking lugs, feed ramps, bolt face, extractor and ejector claws and plungers, safety catches. It’s very important to wipe any gun down with an oily rag or a silicon-impregnated cloth, as your bare hand has surface acids that can ruin bluing or bare metal all too easily. Give a thought to the magazine too, be it fixed or removable, as it’s a good place for debris to build up in. Your ammunition could pick up dirt, which would be rammed into the chamber and scratch of otherwise cause potential damage.
If you can only clean a rifle from the muzzle, that usually means you won’t be able to remove the bolt and mechanism easily and it’s better not to try. A squirt of solvent through the ejection port, should blast out some gunk followed by a small spray of light oil, as mechanisms tend to work better with a bit of lube, never over lubricate. Also consider that coming in from the muzzle means your jag could hit the breech face, not a good idea, especially if you are being a bit aggressive. Best to put a thick pad of material over this critical area to protect it. And of course, remember that fouling removed from the bore could end up in the chamber. It’s possible to get large cotton buds that are perfect for getting into chambers.
Cleaning Intervals
As to the question when do I clean? Well, that’s down too good sense and also the amount of rounds you shoot at any one time. If your gun gets wet when out hunting, then take it home, strip it down and dry it out then re-lubricate. Or if it’s just mud, then wipe it off and if the stock is wood it might need some TLC.
Target shooters tend to shoot a lot more than hunters and generally will have a strict cleaning regime; it could be anything that suits, 100, 200 - rounds, or whatever. This could even include deeper cleaning and checks as the round count climbs. Hunters, after some time will know when their rifle starts to loose accuracy and base their process around that. In either case, bear in mind that after cleaning the barrel might not initially shoot straight, due to the residue left inside. A few fowling shots (to scrub it out) will cure that, or a swab through with a patch soaked in methylated spirits to get back to bare metal.
Moderators
Sound moderators too come under the cloak of cleaning, as they present their own difficulties. In the old days the one-piece (sealed) build of some designs meant all you could do was to squirt some oil or solvent up the centre and hope it did some good. The all-steel, BR Tuote was a classic example, as they would rot from the inside, due to the massive temperature changes causing moisture to form on the ferrous build. Designs that could be stripped to clean seemed to be the answer, but if you did not use an anti-seize compound (special, high temperature grease) on the threads the firing residue would get into them and seize them solid too.
Today, we have ultrasonic baths to clean awkward items like this and general gun parts too. Filled with water or mixed with cleaning fluid the unit vibrates at high speed that removes all manner of fouling from every area.

Coatings
In the old days the metal work on a rifle or shotgun was chemically blued to give a protective skin to the bare metal. Even when well done the finish was reasonably fragile and prone to damage and wear. Other options included blacking and parkerising, which in some cases improved protection.

Today, technology has come to our aid with hi-tech and durable coatings. A favourite is Cerakote, which is a special paint that is baked on and allows multiple colour choices in a massive range of finishes and even patterns, to give a tough, weather-proof and even attractive finish. Barrels and actions are bead-blasted back to bare metal then the paint is applied. There is also a non-oven version for delicate items like telescopic sights.
You can also get your guns dipped in a transfer, much like decals on a model aircraft kit, but a lot tougher, especially when combined with modern and durable varnishes. JP Sauer & Sohn, the German rifle makers have a protective coating called Ilfalon, that is near totally resistant to salt water, chemicals and anything nature can throw at it. It comes in a number of colour and even camo options.
You can also buy stencil kits that you apply to sections of your gun and over paint to get a camo effect, one of the most popular is digital. All you need to supply is a hobby spray gun and the correct colour and type of paint.
Storage and transit sense
As can be seen, cleaning any sort of firearm is not rocket science, but you do need the correct equipment to do it properly and the knowledge. If you put this task under the catch-all of protection, then our thoughts should turn to associated areas to protect your precious guns at home and away.
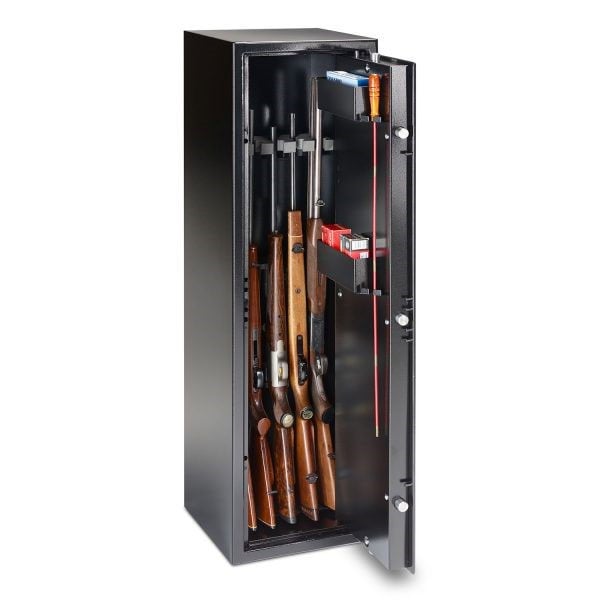
By law we have to store our guns in ‘government-approved’ metal cabinets, no problem lots of those around. Also, these have to be secured to a structural wall and preferably out of common view. Many people choose the loft space of their house, for obvious reasons, as it’s very much out of sight, out of mind. Trouble is, it’s also very hot in the summer and freezing in the winter. And you have many issues to contend with.
Condensation is a big one, as you remove the gun from the box and take it downstairs to the warm part of the house. Instantly moisture forms on the steel inside and out and we all know what that leads to? Best to put it in a gun bag first and leave it in there until it normalises. Regardless, the fluctuation in temperatures can do the same thing and a product we would recommend is Napier’s Super VP90 Vapour Phase Corrosion Inhibitor. It comes in sachets with a self-adhesive pad and when open and stuck in a gun box it exudes a film of material that coats all surfaces, so protecting them from corrosion. It’s self-healing too, so fingerprints cannot cause problems. And works for up to one year. They also do small packets to go in gun bags.
Out in the field you’ll need a decent gun bag for both protection and to cover it up from prying eyes. There are many good types, some with external and/or internal pouches for carrying extras. Some even come with rucksack-type harnesses for easy carriage over long distances.
And if you hunt overseas then you will need an airline-safe hard case by law and also to protect them from over enthusiastic baggage handlers. Again, there are many makes and types, all offering both protection and storage in transit. We recommend getting one with wheels at one end, as it’s easier to push round an airport.
Another useful trick is, and if you can, at the end of your shooting session and while the guns are still hot, patch them out with solvent and take them home like that. When you come to clean them, the fowling should be nice and loose and easier to remove.
Cleaning Kit Check List
- Proper kit commensurate with the gun being cleaned
- Correct size rods, jags and patches
- Bore cleaner, gun grease and oil
- Specialist fluids; copper remover, bore polish
- Stock oil
- De-greaser
- Spray oil
- Rifle vice
- Bore guide
- Silicone wipe down cloth
- Cleaning matt
- General cloth for wiping
- Lens wipes or cleaning fluid
- Lens pen
Top Tips
TOP TIP: Although not cleaning related, by using your rod, jag and patch you can easily determine the rifling twist of your barrel. Which will allow you to determine the best bullet weights for it. As heavier bullets require a tighter pitch than lighter ones.
Start by pushing the rod complete with jag and fitted patch into the chamber and then about an inch further, so it’s fully engaged in the rifling. Mark the rod where it enters the receiver with a pen (first datum line). Go back up the rod about 16” and put a dot (second datum point) at 12 o’clock.
Now slowly push the rod up the bore and you will see the second datum rotate as the jag rides the rifling. Keep pushing until the dot comes back to 12 o’clock and stop, mark the rod again where it enters the receiver the second time (third datum line), pull it out and measure between the first and third datums and that length will be the amount the bullet will rotate in one revolution and in which direction. For example, if this distance is 12” then the rifling pitch is said to be one in twelve, normally displayed as; 1-12”. And if the rod turns to the rights as it enters then it would be a right hand twist. Simples!
TOP TIP: If the rod with jag and patch is very hard to push in, stop and remove it, as it could bulge the barrel or get stuck if you continue. Never, force it!
TOP TIP: Where possible always clean from the chamber end, as you will be pushing the fouling out of the barrel, as opposed to pushing it into the chamber and action if you go in from the muzzle.
TOP TIP: Never fire a gun with oil in the bore, as in extreme cases it can cause a bulge as the bullet/shot load passes over it. A quick, rod through with a patch treated with solvent before shooting should dry it out.
TOP TIP: With break-barrel shotguns, a drop dab of gun grease on the hinge pin and trunnions and a drop of light oil on the forend latch will keep things easier and reduce wear.
TOP TIP: Don’t mix up your jags & brushes in a common box, segregate them by calibre, as some look all to similar to others.
TOP TIP: If your gun gets wet, then strip it down and dry and oil it as soon as possible. A wipe down of external surfaces is not good enough, as if water gets inside it will soon turn to rust if not removed.
TOP TIP: Never store a rifle with the moderator fitted, as moisture will build up and start rusting, usually at the crown. If you have to leave a moderator on then store the gun muzzle-down, but only if necessary.
Disclaimer
The information, including text, graphics, images and information expressed in this publication are general in nature. Viking Arms Ltd assumes no responsibility for the accuracy of the information contained on or available through this website or its suitability for any purpose and such information is subject to change without notice. You are encouraged to confirm any information obtained from or through this website with other sources. Information on this website may not constitute the most up to date legal or other information.
The opinions expressed in this publication are those of the authors. They do not purport to reflect the opinions or views of Viking Arms Ltd.
Head Office Address
Viking Arms Ltd, Summerbridge, Harrogate, North Yorkshire, HG3 4BW
Contact Details
Sales: 01423 780 810 (Ext 1)
Email: info@vikingarms.com

