Ultimate Guide to Optics
In our 'Ultimate Guide to Optics' you'll find everything you ever needed to know about hunting and shooting sports optics. If you're looking for a new hunting scope or shooting sights, then make sure you download this guide to understand everything you need to know about buying a scope. It will help you to understand what features to look for and how best to invest your budget.
DOWNLOAD OUR
Ultimate Guide to Optics
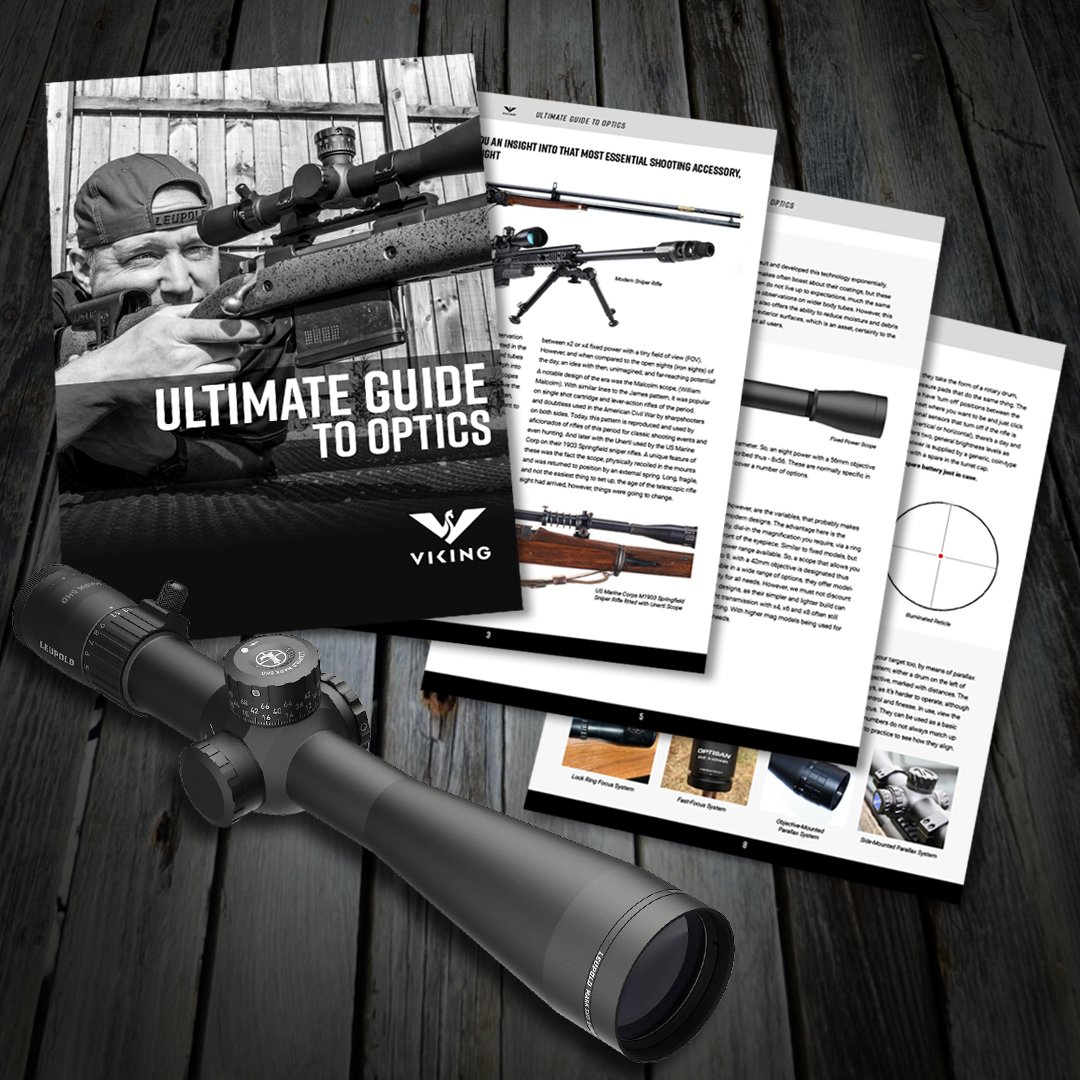
Viking Arms offers you an insight into that most essential shooting accessory, the telescopic rifle sight
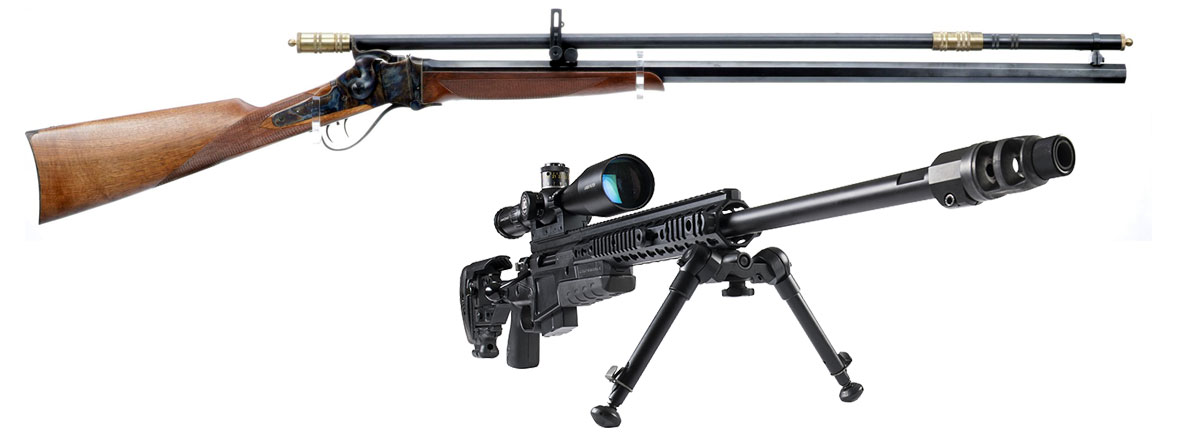
Sharps Rifle with Malcolm Scope and a Modern Sniper Rifle
The introduction of optical devices for longer range observation can be traced back many centuries and probably originated in the Middle East or China. These would have been simple, fixed tubes with a lens at one or both ends, that would eventually morph into what we know today as the generic, draw or spotting telescopes and binoculars. The first devices specifically made to improve the accuracy and performance of rifles are accredited to American, Morgan James of Utica NY in the early 1800s and a lot different to what we use today, although principles remain the same.
Essentially, a long, slim metal tube with a lens system inside and a basic reticle (cross hair) with some means of focusing. Adjusting for zeroing and distance was all external, with mounts that allowed the user to physically move the tube in two planes - windage and elevation (left/right, up/down), in relation to the barrel.
Magnification ability (power) was probably quite low at between x2 or x4 fixed power with a tiny field of view (FOV). However, and when compared to the open sights (iron sights) of the day, an idea with then, unimagined, and far-reaching potential!
A notable design of the era was the Malcolm scope, (William Malcolm). With similar lines to the James pattern, it was popular on single shot cartridge and lever-action rifles of the period. and doubtless used in the American Civil War by sharpshooters on both sides. Today, this pattern is reproduced and used by aficionados of rifles of this period for classic shooting events and even hunting. And later with the Unertl used by the US Marine Corp on their 1903 Springfield sniper rifles. A unique feature of these was the fact the scope, physically recoiled in the mounts and was returned to position by an external spring. Long, fragile, and not the easiest thing to set up, the age of the telescopic rifle sight had arrived, however, things were going to change.
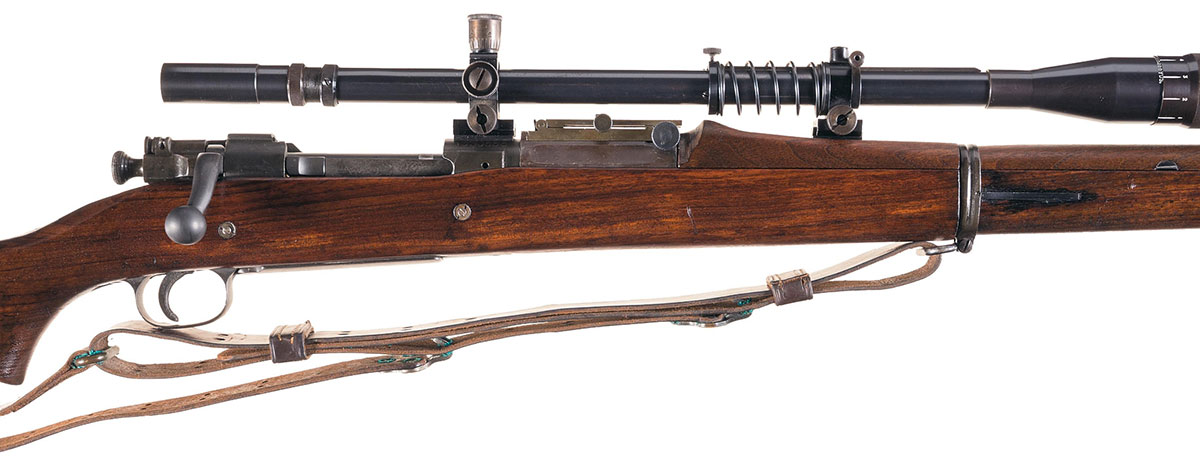
US Marine Corps M1903 Springfield Sniper Rifle fitted with Unertl Scope
KAHLES
Many feel the birth of the true, modern rifle scope we know today can be credited to the Kahles company of Austria. A respected optical manufacturer of the late 1800s, they introduced their first model, the TELORAR, in 1898, which very much set the style, principles and design
concepts for all future optics. In 1908 they launched the MIGNON, that is easily recognisable even by today’s standards and went on to be one of the major players in the industry.

Kahles Mignon Scope

Since that time, many large and respected manufacturers have risen to cater to our needs: Weaver, Swarovski, Zeiss, Leupold, Schmidt & Bender, Meopta and Night Force to name a few. And what was near exclusively a European and American-driven industry, has opened up worldwide. For many years, the industrial and technological might of China and Japan have been learning how to make quality and competitive modern designs to suit everyone’s pockets and needs! As we shall see, there have been some amazing, technical innovations over the years, with some designs now capable of not only telling you the distance to target, but also automatically adjusting the reticle to make that all-important, first round hit. Doubtless, the likes of William Malcolm, Morgan James, and Karl Robert Kahles would have approved?
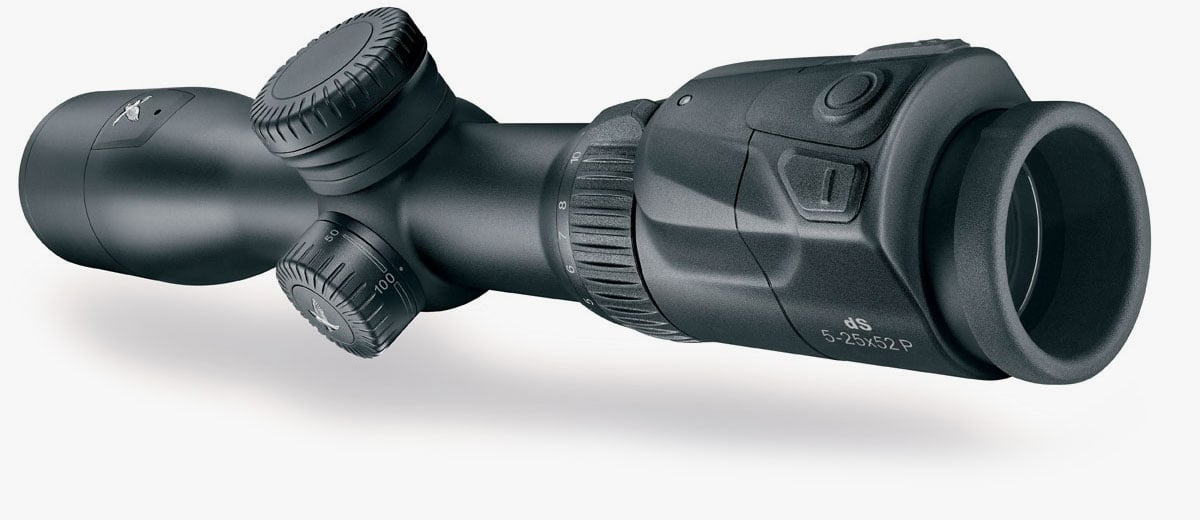
Swarovski’s DS 5-25X52 incorporates not only a laser range finding system, but also a self-adjusting reticle and is programmed via a smart phone and app
the BUILD

So, let’s look at the generic modern rifle scope and see what makes it tick. The outer, consists of a round, light metal tube (body tube) mainly, aluminium alloy, but in the past steel, which is rare these days. All offered in a number of diameters - 1”, 30mm, 34mm and occasionally wider. You might encounter older, European models with 26mm tubes, but these are now on the decline. However, today, the 1” and 30mm are by far the most prolific. Inside is the glass lens system, consisting of a front (objective) and rear eyepiece (ocular) units. In-between are the rest of the elements that allow you to adjust the power and set the reticle along with focusing and in illumination.
You might wonder about the different body tube sizes, which in some cases has become more a fashion statement. In theory a wider internal diameter (ID) should improve light transmission, and allow more reticle adjustment, which is not always the case, given the actual ID. The industry knows that 30mm is by far the most popular tube size, so, mostly offer that regardless.
Top Tip: If you’re buying a scope, count the number of rotations the turrets offer, also look through it in low light and at all power settings, which will give you a better idea of its ability!
Let There Be light
An important factor for any scope is light transmission, which is the ability for the light to pass through from front to back to get to your eye and give the best picture and colour rendition possible. With the insides, packed full of glass that is not easy. A larger objective lens can help as it will allow more light in, certainly in darker/duller conditions. But, what really makes a difference is glass quality combined with specialist lens coatings, Kahles was one of the early pioneers in this area and the
industry has followed suit and developed this technology exponentially.
Cheaper makes often boast about their coatings, but these claims often do not live up to expectations, much the same as previous observations on wider body tubes. However, this technology also offers the ability to reduce moisture and debris build-up on exterior surfaces, which is an asset, certainly to the hunter, if not all users.

Fixed Power Scope
Scopes will be encountered in a number of specifications as to magnification and features. The simplest is the fixed, that offers a single setting and is designated thus - a number, being the magnification,
EG: x8 (eight power) followed by the objective (front) lens diameter. So, an eight power with a 56mm objective would be described thus - 8x56. These are normally specific in their use and cover a number of options.
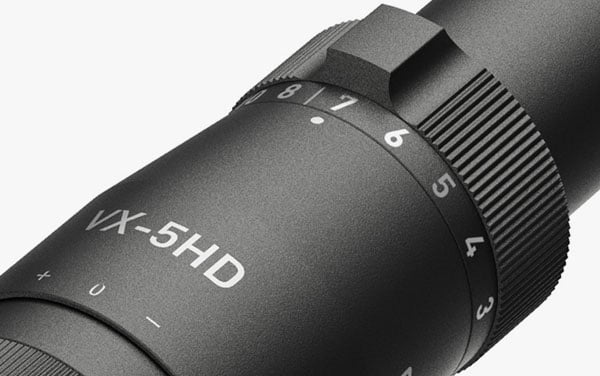
Scope Magnification Ring
Most popular however, are the variables, that probably makes up 80-90% of modern designs. The advantage here is the ability to, literally, dial-in the magnification you require, via a ring positioned in front of the eyepiece. Similar to fixed models, but reflecting the power range available. So, a scope that allows you to go from x3 to 9, with a 42mm objective is designated thus - 3-9x42. Available in a wide range of options, they offer model-specific flexibility for all needs. However, we must not discount the fixed power designs, as their simpler and lighter build can mean better light transmission with x4, x6 and x8 often still favoured for hunting. With higher mag models being used for more precision needs.
Turrets
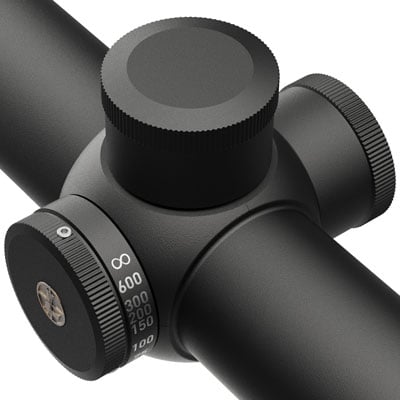
Capped Turret
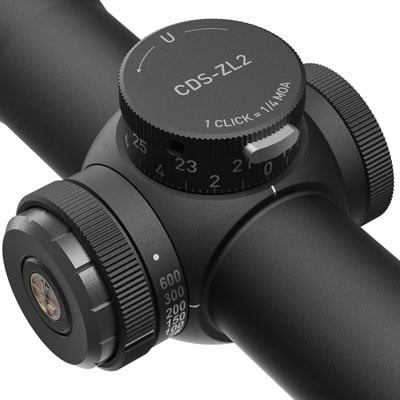
Target Ballistic Turret
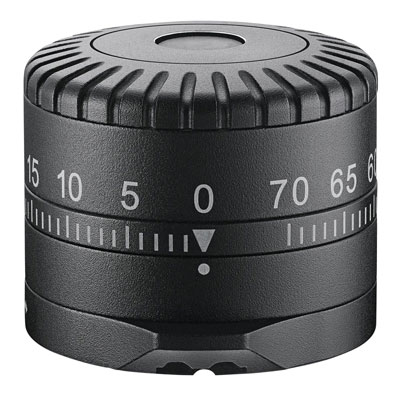
Swarovski BTF Turret
At the other end of the scale, we have the precision or tactical (ballistic turrets). Larger, they don’t have a cover cap and are designed to be dialled in as to the range and windage required at the time. They are marked with values and when zeroed, set to a 0 position that the user can dial up or down, to compensate for range and windage. EG; a target appears at 600m, you wind the turret to that setting and shoot, the next appears at 200m and you re-adjust on what are pre-set parameters. Given you know your ballistics and input them correctly they are very useful, even for hunters.
These have been further refined by the ability to lock the turret at any given setting, so you don’t accidentally knock it off position, very useful! There’s also ‘zero stop’, a feature that and after zeroing can be set, so you can’t rotate the turret back any further. It’s possible to get ‘lost in elevation’, so the ability to quickly, wind back to 0 is near essential. Other designs feature removable marker rings, that can be set for different ranges and positioned on the turret, making it faster to get onto a distance. Swarovski take this a stage further with their removable BTF (Ballistic Turret Flex) unit, so you can convert their scopes to a set & forget or ballistic-types.
Top Tip: with non-locking, ballistic turrets always check you are at the correct setting before shooting, as they can be moved without you knowing it.
A caveat here, is that manufacturers, will quote factory ammunition ballistic data for most calibres, as to range. This is intended to be used with the correct turret markings or setting. This information was probably gathered from a 24 or 26” premium grade, test barrel. Chances are your rifle will have a more standard, 20 or 22” tube and velocity/performance will be noticeably reduced, due not only to length but manufactures tolerances. This then will have a negative effect on the point of impact; on paper, just embarrassing, but in the field the difference of a wounded and lost animal or a clean kill. To take proper advantage of this sort of system, you need to know your actual velocity and bullet drop out to your maximum practical shooting distance. Equally, practice on targets at all ranges and don’t rely on what they say.
Values
All turrets have graduations (clicks) of different values, given the maker’s choice or model requirement. The Americans favour Minute Of Angle (MOA) normally in 1/4 or 1/2 clicks, some more precision models use 1/8. MOA is an angular measurement equal to 1/60th of 1 degree, in linear terms it measures 1.047”, but for most needs consider it an inch, it’s only at longer ranges the 0.047” extra will have more effect. The Europeans favour metric with 1cm (10mm), the standard 1/4 MOA is smaller at 6.35mm, however you can also get 0.5 cm (5mm) clicks, which are not so common. Milliradian (Mrad) are more common now with the option of 0.1, 0.2 and 0.5 mil. More of that later when we look at Mil-Dot!
One aspect of either system you must bear in mind, is, the above values are for 100 yards/meters accordingly, but as the range increases values become cumulative (increasing by successive addition). Put simply at 200 yards a 1/4 MOA will now subtend 1/2 MOA and so on. This fact must be born in mind if you want to dial in a distance. Or, use your reticle for holdover, given if your scope uses a 1st or 2nd focal plane system, which we will be coming on to.
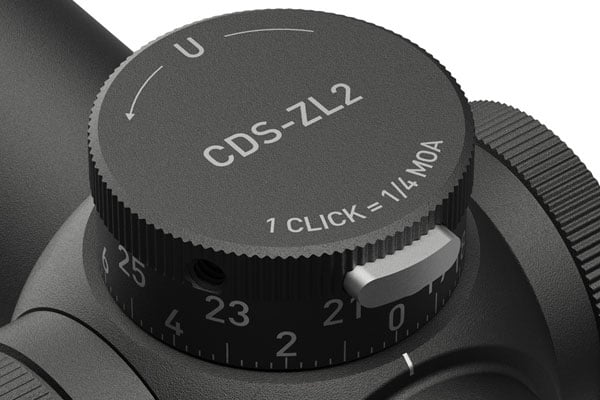
Obviously, turrets will offer multiple clicks, rule of thumb is between 40-50, per turn, along with a number of full rotations, usually less on general use/hunting scopes and more on longer range models. Both features need considering when buying. Equally, how the clicks sound and feel, a firm, tactile movement along with a positive noise when dialling, will allow you to count them easily and precisely.
Getting Cross
Reticles originally were a simple cross hair, which is a design that allows easy and precise placement on your point of aim. But, and as scopes became more diverse in what they were required to do, things got more complex and mission-specific. Thicker lines (posts), different patterns, aiming and range finding marks (hash marks), ballistic drop compensation (BDC) the list is only limited by ingenuity or need.
Today we have electric systems that can connect to ballistic and weather apps on your smart phone and determine the correct aim point and inject it into the actual reticle on specialist scopes.
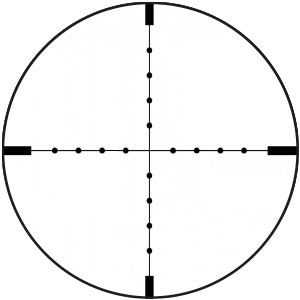
Mil-Dot Reticle
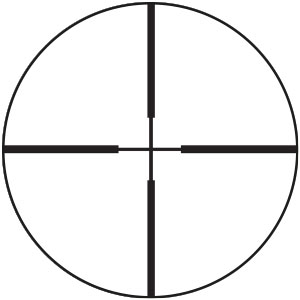
30-30 Reticle
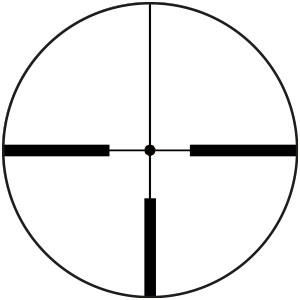
German No.4 Reticle
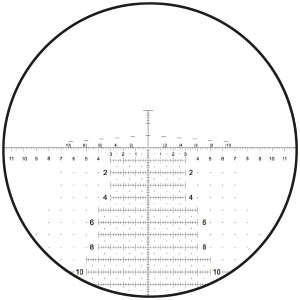
Horus Reticle
A word of caution here, some patterns try to offer it all and tend to be very crowded/busy in terms of what you see. The Horus is a good example, as it literally offers a mass of lines and dots that allows for both range and windage correction.
Great idea, but so easy to get lost in, as suggested before seeing what they offer and how that fits in with your actual requirements!
Let There be Light
Then we come onto illumination, the ability to light up sections, or all of the reticle for greater clarity in low light conditions, sometimes in more than one colour. Potentially useful, but build quality and design are the bywords here. Too bright or too much, will blow the reticle out so making it useless, which is even worse on a complicated pattern. Practically speaking, less is usually more, and on a dull morning in the woods or at dusk, a simple, red centre dot is a definite asset when correctly used. But choose wisely and try before you buy.
Illumination level is set and adjusted by an integral control called a rheostat, normally positioned on the left of the saddle or the eyepiece bell at the rear, they take the form of a rotary drum, marked from 0-11, or pressure pads that do the same thing. The more sophisticated types have ‘turn off’ positions between the numbers, so you can pre-set where you want to be and just click onto it. Some have positional sensors that turn off if the rifle is out of shooting position, (vertical or horizontal), there’s a day and night feature too, that offers two, general brightness levels as required. In most cases power is supplied by a generic, coin-type battery, some even come with a spare in the turret cap.
Top Tip: Always carry a spare battery just in case.
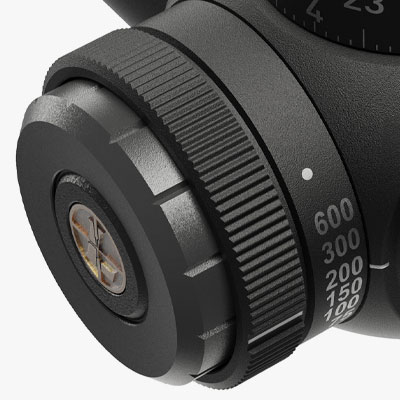
Saddle Mounted Rheostat
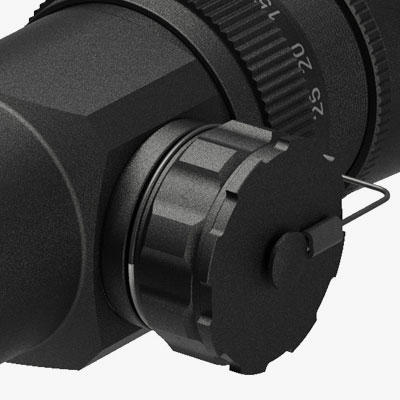
Eyepiece Mounted Rheostat
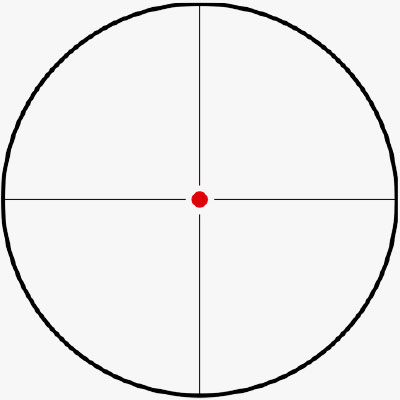
Illuminated Reticle
Focusing In
In all cases you need to focus the scope, even if it’s just the reticle, and there are two basic systems. Both positioned on the eyepiece (ocular) bell, the ‘lock ring’ allows the whole rear lens assembly to rotate and once in position, it’s tightened to ‘lock’ it in place. More common these days is the fast-focus or European-style. Here, the rim of the ocular turns only, making it faster and easier to adjust, but as it does not lock, so potentially easier to move off position.
Focus can also be applied to your target too, by means of parallax control, which is a separate system; either a drum on the left of the saddle, or a ring on the objective, marked with distances. The latter is less popular these days, as it’s harder to operate, although being larger it gives greater control and finesse. In use, view the target and rotate until it’s in focus. They can be used as a basic rangefinder too, although the numbers do not always match up with the distances, so it’s best to practice to see how they align.
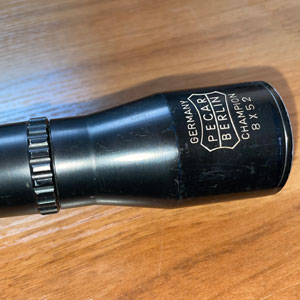
Lock Ring Focus System
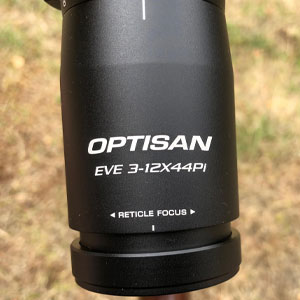
Fast-Focus System
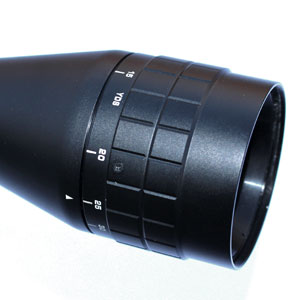
Objective-Mounted
Parallax System
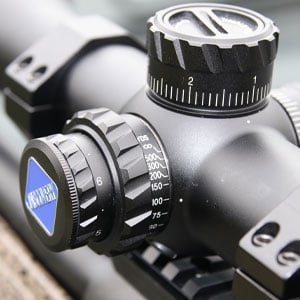
Side-Mounted Parallax System
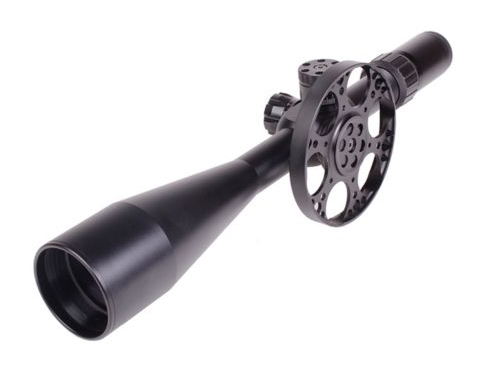
Field Target (FT) airgunners use parallax to ascertain range, which is essential for their discipline. With hi magnification scopes, wound up to maximum mag, you create a very short FOV that with practice gives precise results. Normally a larger sidewheel is fitted, for the distances and spacings required. Set up consists of getting down on the ground and shooting the distances and marking the wheel accordingly. This can also be applied to firearms use too.
Large FT Sidewheel
Nomenclacture
Field of View
FOV what you can see of the target at maximum and minimum magnifications and ranges
1st and 2nd Focal plane
where the reticle is positioned
Eye relief
distance that your eye needs to be from the rear of the ocular
Cheek weld
head position on the butt that ensures proper eye/scope alignment
Twilight factor
a number that indicates low light performance, the higher the better
Relative brightness
a number indicating an optic’s brightness the higher the better
Scoped
being hit by the scope in recoil, if your face is too near to the rear lens
Body tube
main parallel section of the scope body
Objective housing
where the front (objective) lens is located
Ocular housing
rear bell of the scope
Clicks
generic term for the various adjustment graduations available for turrets
Parallax
ability to separately focus on the target
Illumination
ability to light the reticle in a colour or colours
Stadia
lines that make up the reticle
Hash marks
lines that intersect the stadia and give more aim-off options
Windage
the horizontal movement of the reticle
Elevation/depression
the vertical movement of the reticle
QD mount
purpose built, one-piece scope mount that is easily fitted and removed
European rail
a mounting system that does not use rings, instead engages with lugs integral to the underside of the body tube
Focal Plane
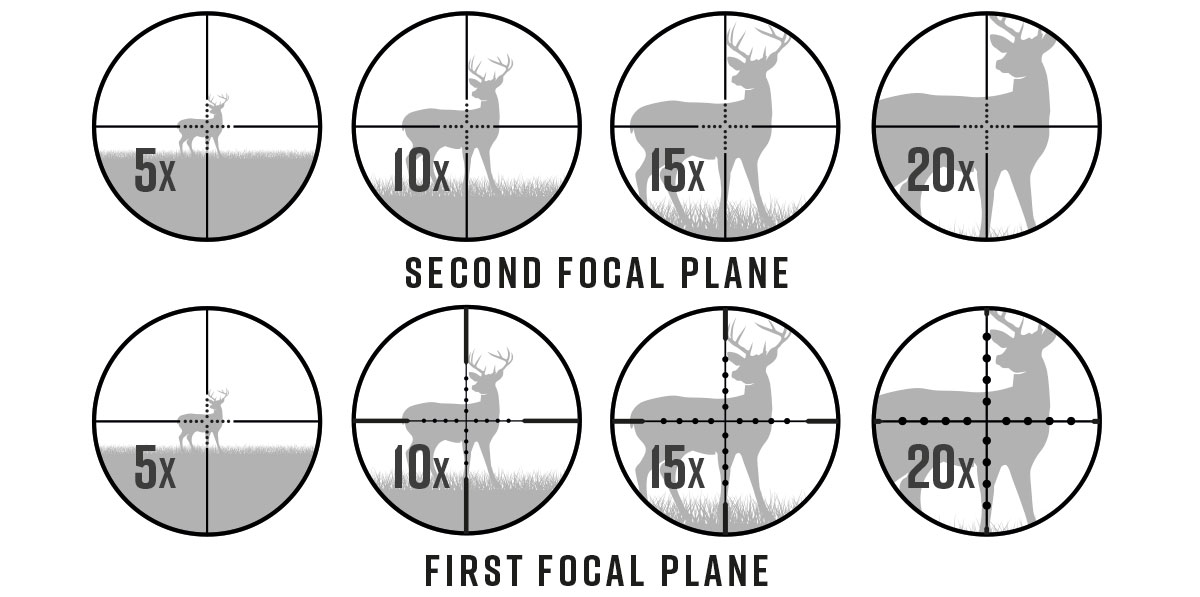
What focal plane your scope’s reticle is in, can and does cause a lot of confusion, as each system has plus and minus points, and we’ll try to keep it as simple as possible! It all depends on where the reticle is positioned in relation to the erector tube (mechanism that the turrets push on to set zero and input corrections for windage/range), found inside the saddle area. First focal plane (FFP) is set in front and second (SFP) behind, normally at the scope-end of the eyepiece bell.
With FFP the relationship of the reticle to the target is constant. Let’s take a 3-9x42 variable scope, at x3 the reticle appears small as does the target, as you wind up the magnification both increase in size.
At x9 it appears thicker and you can see less of its periphery, also less of the target but in greater detail. Given the design, this can make zeroing and placing it on the point of aim more problematic, due to its seeming size changes. SFP differs, by the fact the reticle always stays the same size in the view, with just the target getting bigger/smaller as you dial magnification. This appears the better system and, in the USA, more popular, with FFP being more a European thing and initially considered inferior by British and American shooters, which is not the case, as it’s more prolific today.
Horses For Courses
The major differences in what FFP and SFP offers revolves around how you use the reticle. Remember we said that some patterns offer all manner of BDC-type aiming points, which are ideal for fast changes in range, once learned in relation to your rifle’s ballistics. And in use, faster than dialing in.
Let’s take a 3-12x50 FFP scope with a number of stadia (hash marks) on the 6 o’clock arm, centre zeroed for 100m. At 200 yards, bullet drop with a 165-grain 308 Winchester doing 2625 fps is 3” and that matches the first hash below the centre cross. Regardless of what magnification has been set that 3” drop will remain the same for that distance, so all you have to do is place it on where you want the bullet to go and fire. This will apply for all ranges and BDC markings, however, they may not line up exactly. Say at 300m drop is 5” and 1.5 hash marks are required, so, it’s not hard to calculate the extra and apply it to the reticle.
Let’s take the same scope, zero and cartridge but in SFP. The nature of this plane to do the same thing as the FFP requires a factory set magnification, in this case x12 (maximum), which is not always ideal as it might be too much for the distance or harder to hold steady on target. Change the mag and what was your 300m hold point (1.5 hash marks) will no longer be so. Manufacturers will normally include the correct setting, which is usually maximum, although it can be calculated for different powers.
In summary, FFP at high mag can lose a lot of the reticle, worse if it contains ballistic markings. Conversely at lower mag, it can be too small to use easily, however, you can dial up at any power, with no loss of ballistic accuracy. SFP, retains the full reticle facility, but gives false measurements at the wrong mag settings unless adjusted. Regardless, either system will shoot to set zero. FFP has gained popularity amongst longer range, precision-type shooters recently with many US makes offering this facility. But, given the need here for hi mag, SFP is at no disadvantage, both systems are equally useful for hunting.
Mil-Dot
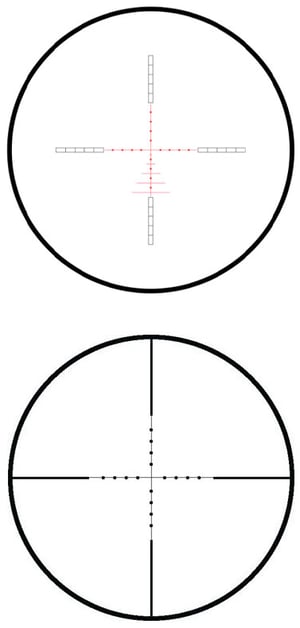
Mil-Dot is probably the most misunderstood system. It was originally conceived for snipers to be able to calculate ranges through the scope. It uses the Milliradian (Mrad) system and like MOA is an angular measurement. It subtends 3.6” @ 100 yards and 10cms @ 100 meters and is cumulative. So, at 200 yards it subtends 7.2” and so on, so at 1000 = 36”. The concept is that if you know the height or width of an object, this can be used in relation to how many Mil-Dots it subtends to give the range. Snipers are taught to measure things like doors, windows, people etc. to get average heights as a register.
The early reticles showed oval dots on all four arms of the cross, with the space between them being the aforementioned 3.6”/10cms. These were replaced by round or even skeleton dots, more modern versions show slimmer, hash marks, which are more precise. Some might show full and half mil subtensions. In the main sports shooters use them for BDC, holdover marks and they work, often just shooting the ranges and noting fall of shot on target and using that data. The system is massively popular, but be aware that all Mil-Dots are not equal, as cheaper makes just make reticles that might, or might not be what they purport to be.
Top Tip - if you feel mil-dot is for you, get a scope that has mrad turrets, as it makes things easier, preferably with 0.1 or 0.2-click values.
Hands On
Well, that’s the technical stuff out of the way, now it’s time to consider the realities of what you want, compared to what you need! The biggest issue with novices is over-scoping, buying something that is totally unsuited to requirements, just because it looks sexy and has lots of features, some, if not all could be redundant. Do you need multi-coloured illumination, overly complex reticle, a big/heavy variable-type with ballistic turrets for a 22 Rimfire rabbit rifle, what about a side wheel the size of a dinner plate, the answer to these and other questions is a definite NO. All have their place, but, until you gain experience and know what path you will follow apply the K.I.S.S. principle; keep it simple stupid!
Top Tip - when buying a scope consider what it offers in relation to what facilities you actually need)
There’s an old adage that says; you should pay more for your scope than you do for your rifle, not necessarily true, but you get the idea? Modern firearms and airguns are well made so will shoot, but mating them with cheap and nasty optics that won’t do the business is pointless to save a bit of money. The good thing today is that optical quality is very high and will not break the bank, given you choose wisely in relation to what you want to do.
It’s worth bearing in mind that high magnification is a mixed blessing. Sure, you can see greater detail, but with a reduced FOV and light transmission being the result. Equally at high mag, every movement you make in the aim is amplified. Although most will opt for a x3-12 or x3-15, dialling down to x8 gives more than enough magnification and improves on FOV, light transmission and general shootability for most situations. Even more so if you wind down to x6. What these higher mag variables offer is a deal of flexibility that can be put to good use in the right conditions, when used properly.
Today we are seeing a trend in scopes that offer a wider magnification range. Whereas, before a 3-12x50 was considered a good general use optic, you can now get various specifications that increase both top and bottom end use. A good example is Swarovski’s Z8 series, their 1.7-13.3x42 is a true, multi-use design. At x1.7 you can shoot close up on wild boar yet dialled up to x13.3 it can take you right out for some serious long range hunting. This technology is now filtering down to the Chinese and Japanese manufacturers, so you won’t have to pay £2500+ for the pleasure anymore.
Here are some suggestions
General use range or hunting: 3-9x40/50 variable, fixed power x4, x6 or x8.
General hunting: 2-10x42/50, 3-12x50, 3-15x56 variables.
Close range hunting or target shooting: 1-4x24, 1-6x24/42 variables.
General Range use: 3-15x50/56 or larger variables with ballistic turrets/reticle.
Longer range use: 6-24x50/56 or more, with Field Target scopes going up to x50 with even larger objectives for that all-important range finding ability. These are just suggestions and not gospel, but you get the idea?
Mount Up
Fitting a scope to a rifle is a critical yet reasonably simple operation, so first let’s look at the elements required (mounts). Most rifles will come with the tops of the receiver (bridges) drilled and tapped to accept dedicated blocks (bases) that the rings attach to. These can either be in one (rail) or two pieces (individual) options. Due to the varied nature of firearms design they will be different shapes and sizes to suit the spacings on the receiver. With the industry offering solutions for all makes and even solving problems.
Simpler, and usually found on spring air rifles and Rimfire's is some form of integral or bolt-on dovetail system, normally 11-12mm or 1”. Also common are the Weaver and Picatinny rails, the latter being the buzz word these days. Simply put, they are a one-piece design with cross slots machined in them that allows the rings to clamp and engage, so offering a very strong interface. The two systems can differ and often, on cheaper makes you can have some problems with actual dimensions. Normally, bolt-on, some guns feature integral versions.

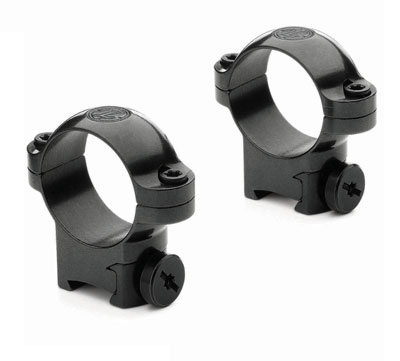
The rings, as the name suggests clamp round the scopes body tube and will be offered in the usual sizes: 1”, 30mm and these days larger, 34mm IDs for example and a number of different heights to suit scope
objective dimensions. They are a two-piece design, base with the cap square above, that can be split either horizontally or vertically and very occasionally diagonally on more specialist builds.
1" Rings
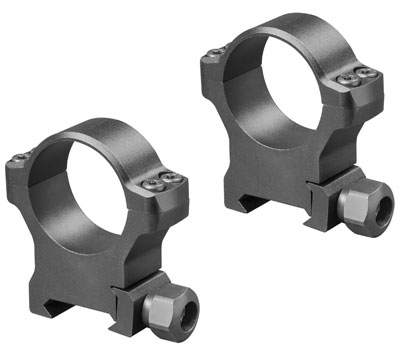
30mm Rings
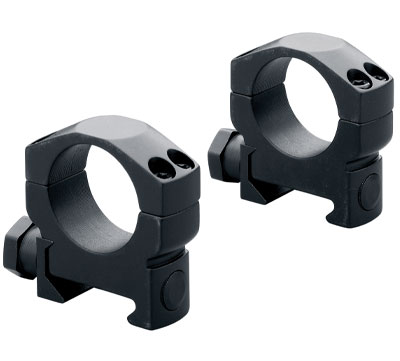
34mm Rings
Others will offer dedicated systems, for example, Ruger’s M77 series sees machined cut-outs on the bridges that specific rings clamp to. More complex, and for that matter expensive, are the quick detachable (QD), one-piece mounts that integrate base and ring, a good example here would be Blaser’s saddle mounts, that will set you back around £400 on top of the price of the rifle.
There are even systems that solve problems. Sportsmatch UK offers adjustable rings, mounts, and bases, that will compensate for scope to rifle orientation and zeroing issues. Burris USA, ring sets use, separate synthetic inserts that allow MOA changes. Most common are Picatinny rails that are machined to give a fixed MOA correction. This is very useful for longer range shooting as it angles the scope’s objective bell down so offering more elevation. Some even incorporate bubbles so you can level the rifle for the shot.
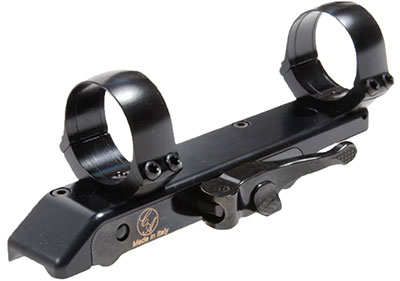
QD Mount
Mating
Top Tip: For scope mounting, a good set of allen keys, torx drivers and small tools is worth consideration
So, how do we link scope and rifle? Let’s take a basic, two-piece base set and Weaver-type rings, the job being pretty similar across the board. In the old days, most manufactures used slot head screws, which are not ideal as they can get chewed up all too easily. Today, Allen and Torx heads (similar system just variations in drive design) are more common and for that matter secure and to be preferred.
Say we have a Remington 700 rifle with a short action, we get a set of bases to suit that will come with screws and maybe an Allen or Torx key. First remove the blanking screws from the receiver, usually needing a small slot head screwdriver. Then clean out the threads holes with some methylated spirt of similar and also the tops of the receiver and underneath the bases.
Check which base fits where, as on the 700, like a number of makes, the rear is usually lower than the front, due to the receiver bridge shape. Some sources recommend using a thread locking compound (LocTite) on the screws, but and unless you never intend to remove the bases it’s not necessary, as it will only cause issues later. Quality, modern rings and bases will be built to high tolerances, with only the correct torque setting required to keep the screws tight, the figures can be provided by the manufacturer. For example, Tier One, recommends their rings be clamped to the bases at 4 Nm (Newton Meters) and the cap squares at 2 Nm. However, you will need a torque wrench and the right drivers, as getting all the screws (bases and rings) to the same pressure is recommended.
Do not over tighten, as the slim screw threads can be damaged, which is a big problem. If you just use the Allen/Torx key then it’s not hard to get them both to the same settings, just by feel. Using the short end of the key gives more control and less leverage, they just have to be tight. Over-tightening in extreme cases can mark, or even distort the body tube.
Highs and Lows
So, bases on and secure, what about the rings? Here, you have to consider the diameter of your scope’s body tube and the width of its objective bell and in some cases the magnification ring (on variables) and even the bolt’s vertical movement. To suit this rings normally come in low, medium, or high configurations, occasionally ultra-high. First, on no account can you let the objective touch the barrel as it will cause a lot of problems with accuracy and the scope physically. It’s best to leave at least a 1/4-1/2” gap, that will also allow a flip up lens cover to be fitted, which again must not touch the barrel.
The height of the scope, head position, cheek weld and eye relief are a delicate balance, which must result in a comfortable and consistent shooting style. The head should be upright and fully supported by the butt, with the eye at the right distance from the eyepiece. All this can be achieved by the correct height rings to a degree, before fully tightening down, the body tube can be slid and rotated in the rings to suit. However, with a low butt comb you might have to add some form of riser pad/extension and there are many options available, or if possible, use lower rings.
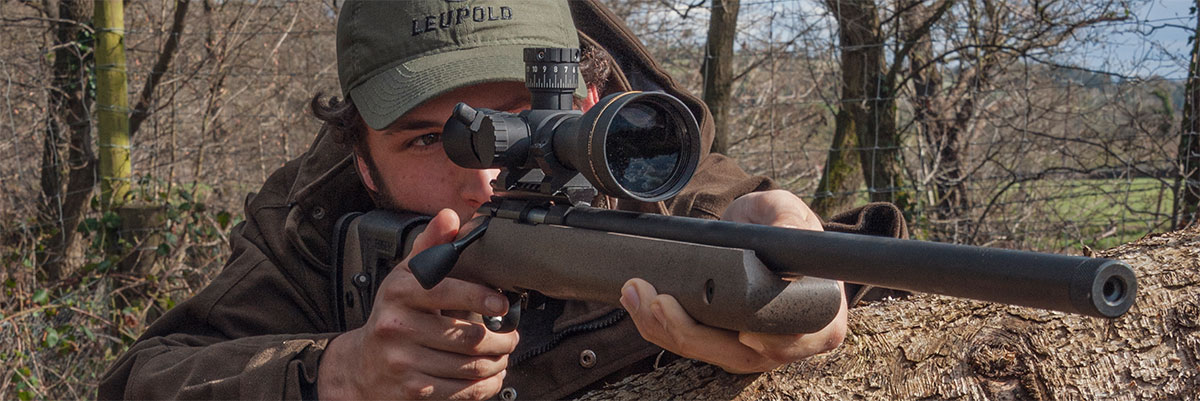
Scoped
You must never strain your head position to accommodate the scope. A mistake often made and usually only once is a condition called getting scoped. Here, the shooter has not set the eye relief properly and if too short they have to lean forward to compensate, on firing the recoil can cause the rim of the ocular bell to smash into face, with painful and often bloody consequences.
This is exacerbated with the larger calibres, with some manufacturers offering models with a longer eye relief to negate it. Another anomaly are the long/intermediate eye relief models, (often called scout scopes). Designed to fit on the barrel over the forend, as opposed to the receiver, they are normally lower powered and have their plus and minus points, in terms of target acquisition and view.
Set Up
So, with bases fitted and the rings attached, both correctly torqued down, fit the scope so the body tube can slide and rotate in the rings. We have now to achieve two things - 1 the correct eye relief and a vertical reticle.
What you are looking for and at will be a full, round image with no vignetting (black ring at the periphery). With variables you might get this effect at low mag, if you set up at high mag, so you have to find a middle ground that suits you.
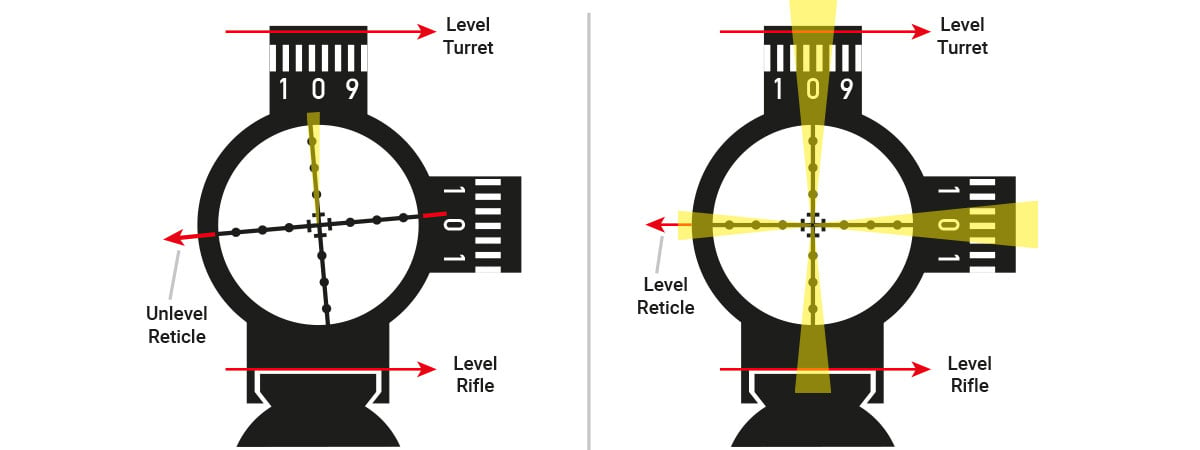
Setting the reticle level can be a bit tricky, as the cross hair must be dead vertical, as in top and bottom stadia at 12 and 6 o’clock and left and right at 3 and 9. It’s best done up against a target at 50 or 100 yards, as that gives a sense of perspective. If it’s not then as the range increases, the offset, will cause your shots to deviate in both horizontal and vertical planes, which can be more of a problem with tactical/precision-type dialling turrets.
Another issue is, if you don’t tighten the screws incrementally and in sequence, you can get a form of back drive that will roll the body tube. Ideally, the gap between the cap squares and ring bases should be even all the way round. Head position and comb height too, can cause problems. If it’s too low, it causes your head to roll over and, in this position, what appears vertical to your eye is not always so. Solutions include using level bubbles to true up the rifle and the scope, also a number of devices that offer inserts and grids you can line up with.
Euro Rail
With reference to rings and bases, there’s one anomaly you might encounter and that’s the European rail (ER). Whereas the aforementioned, separate mounts work on a round body tube, the ER does not use rings to connect, instead the body tube is machined at 6 o’clock with a series of cross slots or clamps that physically bolts the scope to the QD base. It’s a very strong system, but there’s no way of truing the reticle if it’s off centre, short of shimming. Exclusive to European, switch barrel/calibre rifles it’s just that bit different!
Zeroing
Top Tip: Never rush zeroing, take your time and do it properly, don’t forget barrel cooling between strings is essential!
With everything set up, you now have to zero the scope/rifle combo. Regardless, if it’s an airgun or firearm, use the ammunition you will use for your shooting, starting with a clean barrel helps too. To save time and ammo, it’s best to bore sight first, which requires a number of stages.
First, adjust the turrets so they are in the middle of their run, EG - if they offer four full rotations, wind them up or down to the stop then come back two rotations. Next, remove the bolt and turret caps and support the rifle, front, and rear, by means of bags and or bipods, so it is solid in position. At 50 or 100 yards set up a target with a white/round aiming point large enough to be visible (4-6”) and look down the barrel and move the rifle slowly so you can position it in the centre of the bore, so that it stays there.
Carefully, so as not to move the rifle, look through the scope and turn the turrets so the centre of the reticle is on the centre of your aiming point. Here, directions are in reverse, so if the cross is left and high then move the turret in those directions to bring it central, sounds daft but it’s not. Re-check and repeat as necessary, the rifle is not zeroed, but your shots should now fall on paper, making them easier to spot.
Note: Guns with closed in actions or break barrels - spring and pcp air rifles, lever-actions, pump-actions and semi auto firearms cannot be bore sighted, due to their build. all you can do is centre the scope prior to zeroing!
Down, Test and Adjust
Zeroing cannot be rushed, and in the case of firearms they get too hot, so will not give a consistent result, so cooling off is essential. We recommend firing strings of three then a cool down period before continuing. Put up a target at your required distance with a number of small aiming points, which aids precision placement of the reticle, a one inch grid also helps as it will show not only group size but also how far things are off aim. Shoot from a stable and comfortable position. Sitting, supported off a solid bench is ideal, as is prone/supported.
Each time you fire try and keep your shooting and reticle position, breathing and trigger control identical, fire three rounds and note the fall of shot and workout its centre. The group will appear (hopefully) on target and using the grid you can see how big and where it is. Correction is simply a case of moving the turrets in the opposite direction of where the shots fall. We’d recommend zeroing at 100 yards as click values will be true, remember they are cumulative, so will decrease or increase at say 50 or 200 yards.
Assuming we are using 1/4 MOA clicks and the group is 3” high and 2” left, then turn the elevation turret downwards 12-clicks (3”) and the windage 8-clicks to the right (2”). Turrets are marked with direction arrows and values. The amount of correction individual scopes offer will vary, and you may run out of movement, if so, you might need to higher or lower rings, or even adjustable mounts.
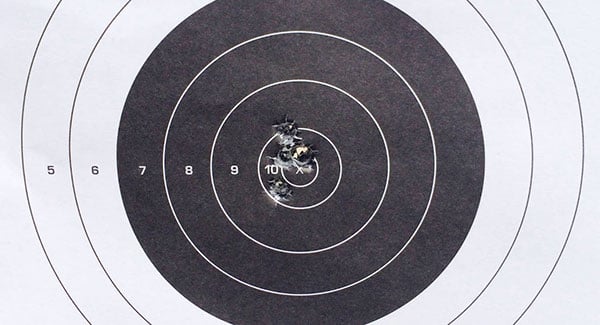
Experiences shows that not all scopes are made equal, on cheaper brands dialling in say a correction of 2 MOA might not give you the assumed 2” of movement. Frustrating but true and often down to weaker springs in the erector tube assembly, also a symptom of a good scope getting old! There is a process called ‘shooting the box’, that will tell the truth. With a zeroed rifle fire a 3-shot group, then using the same aim point move the elevation turret 3 MOA up - fire again, then windage 3 MOA right - fire again, elevation, 3 MOA down - fire again, finally windage 3 MOA left - fire again. If all is well, you should shoot a square, with the last group falling on the first one. Don’t forget your cooling down periods.
Dismount
With fixed-type mounts, if for any reason you need to remove your scope, with or without its rings in place and replace it, never assume it will retain its zero. Even when correctly re-fitted, minute changes will occur, that can cause point of impact variables, so always fire a check group, and re-adjust if required.
Proper quick detachable (QD) mounts usually found on switch barrel/calibre rifles purport to offer a return to zero guarantee, some makes will achieve this, others don’t, so always check and correct if required.
Accessories
Here are a number of items that are worth considering for your scope:
Flip-up lens caps keeps them safe from damage and the elements and can be deployed instantly as required. Ballistic data can be stored on the inside of the rear unit, for quick reference.
Pull-out tapes can be fitted to the body tube that your ballistic data can be written on.
Lens cleaning kits (lens pens etc.) and wipes, allow you to keep exterior, glass surfaces clean and in good condition.
Neoprene ‘scope coats’ will protect from exterior damage, but are slow to remove and better for transit.
Throw levers fit to the magnification ring and aid in dialling.
Spirit level kits allow the scope to be levelled, useful for precision shooting.
Specialist, Weaver and Picatinny rails can be fitted to the scope’s body tube for mounting red dots, lights, or lasers.
If your rifle has iron sights, higher, see-through rings allow their use even with a scope fitted. However, be aware, that these might compromise the ability to zero correctly.
Larger side wheels can be fitted to parallax drums to improve range finding abilities
Disclaimer
The information, including text, graphics, images and information expressed in this publication are general in nature. Viking Arms Ltd assumes no responsibility for the accuracy of the information contained on or available through this website or its suitability for any purpose and such information is subject to change without notice. You are encouraged to confirm any information obtained from or through this website with other sources. Information on this website may not constitute the most up to date legal or other information.
The opinions expressed in this publication are those of the authors. They do not purport to reflect the opinions or views of Viking Arms Ltd.
Head Office Address
Viking Arms Ltd, Summerbridge, Harrogate, North Yorkshire, HG3 4BW
Contact Details
Sales: 01423 780 810 (Ext 1)
Email: info@vikingarms.com

